

When it comes to maintaining the overall appearance and longevity of your vehicle, a clean and well-maintained car interior is just as important as the sparkling exterior. Regularly cleaning the interior of your car not only enhances its aesthetic appeal but also contributes to a healthier and more enjoyable driving experience. However, the task of car interior cleaning can seem daunting, especially if you’re unsure about which car interior cleaning products to use.
In this article, we will discuss car interior cleaning products. We will focus on essential aspects such as cleaning leather car seats, maintaining car upholstery, and identifying the best car interior cleaning products. Whether you’re a meticulous car owner or a professional detailer, this guide will equip you with the knowledge and recommendations needed to achieve pristine car interiors that will leave a lasting impression.
Let’s start by listing 10 of the most essential car cleaning products you will require for a complete car interior cleaning:
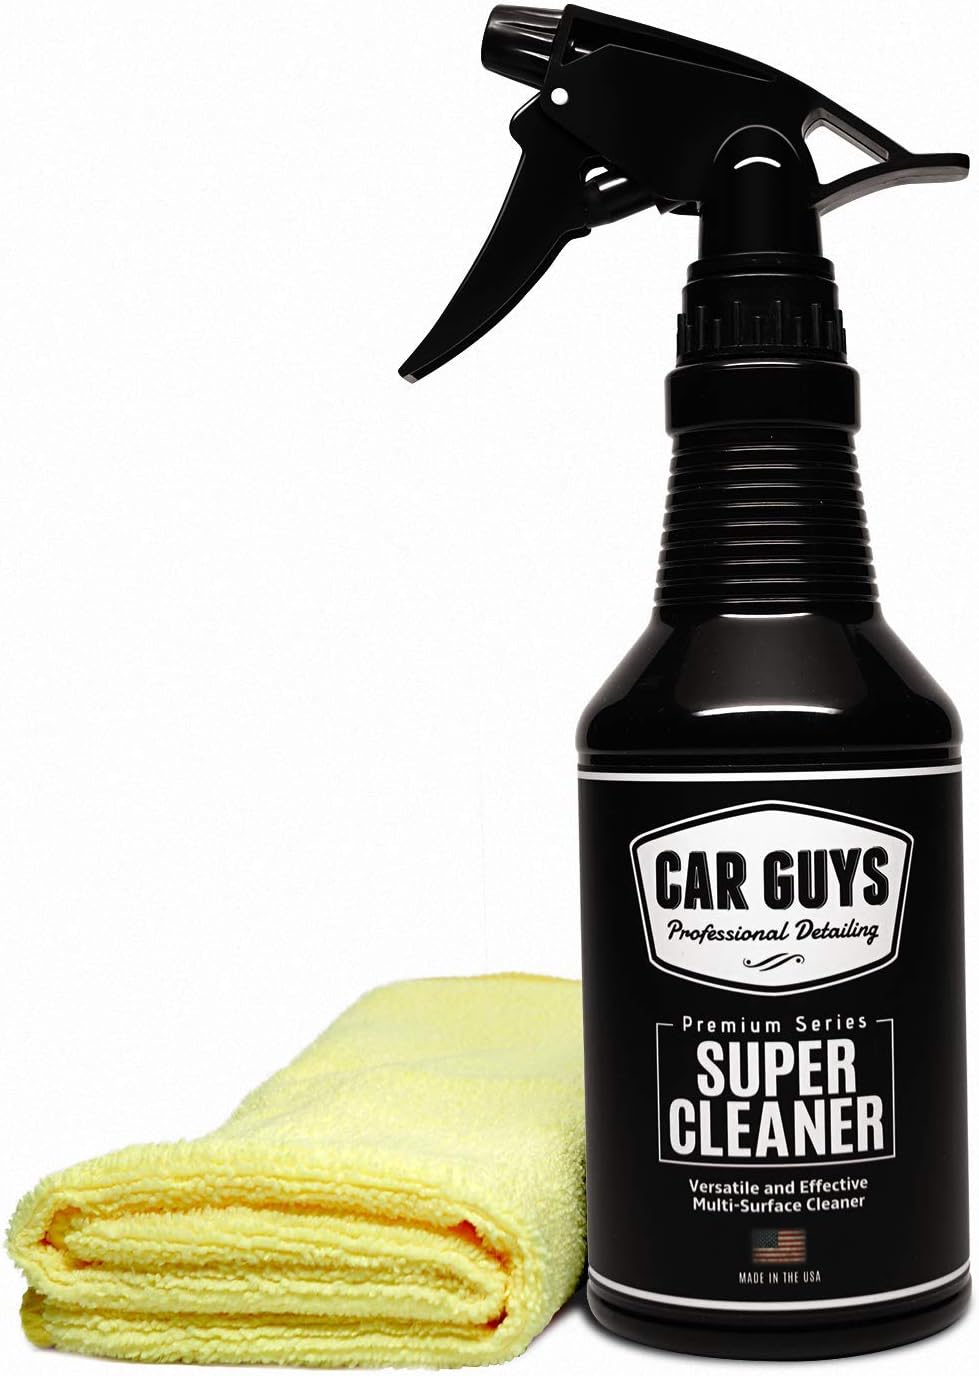
All-Purpose Cleaner
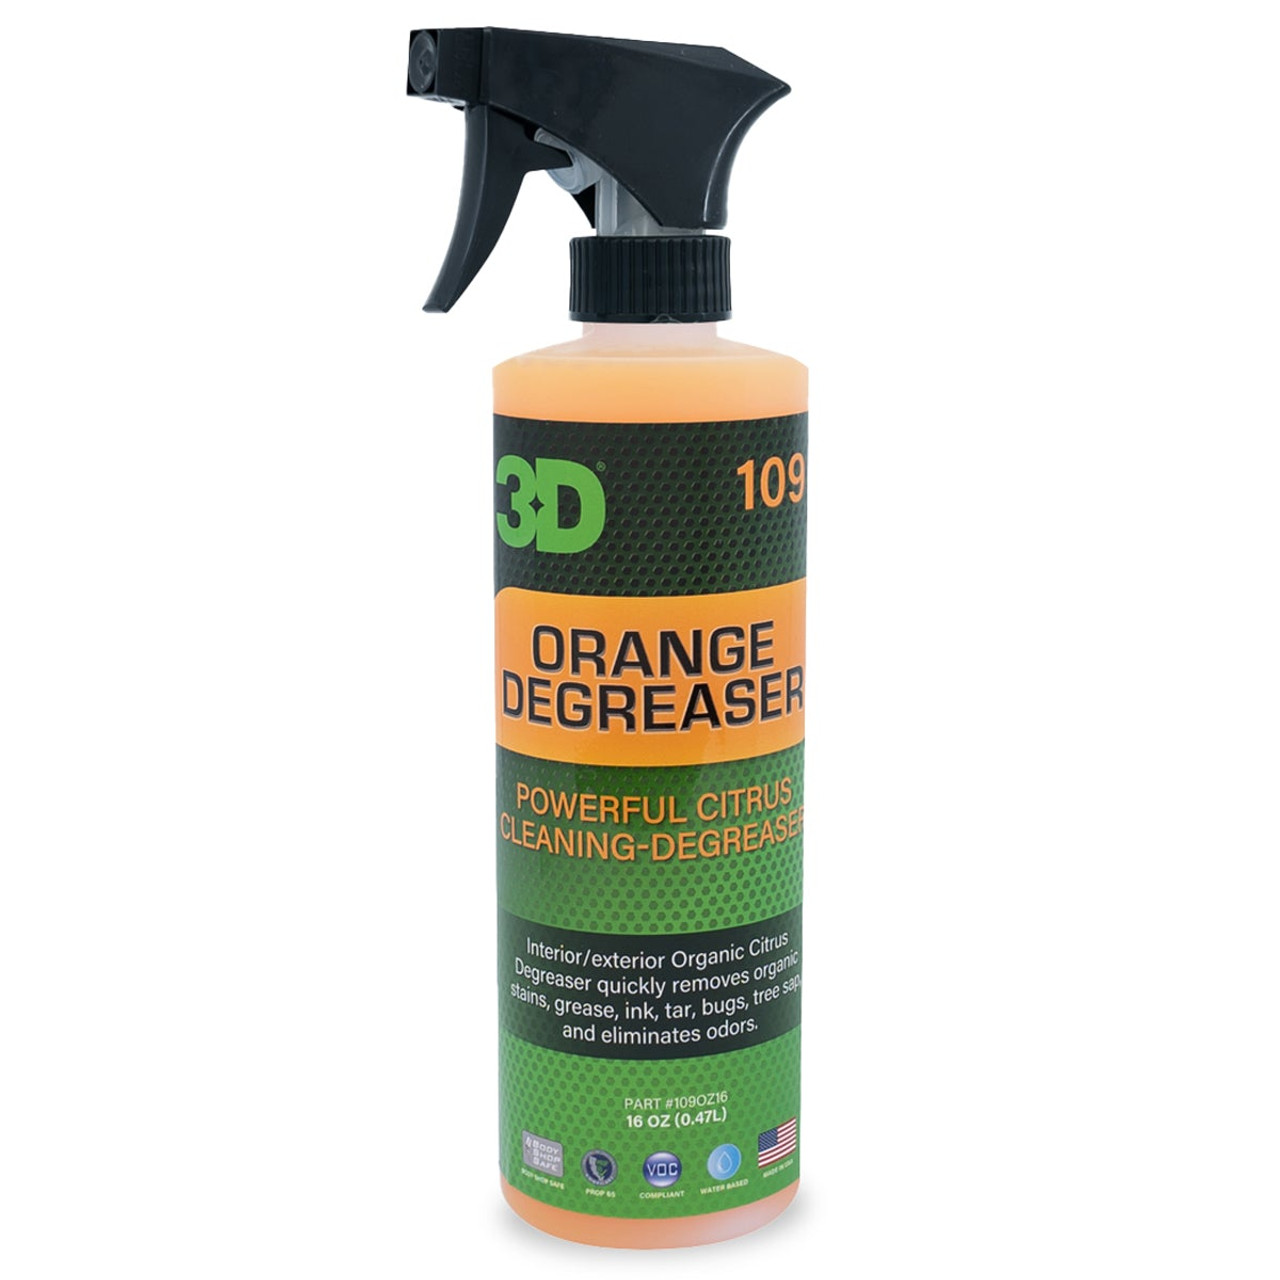
– All-purpose organic citrus cleaner
– Multi-surface application
– Interior & exterior use
– Degreaser & cleaner
– Removes grease & grime residue on plastic, cloth, vinyl, metal, Leather, and more.
When it comes to effectively cleaning the various surfaces inside your car, having a reliable all-purpose cleaner in your arsenal is essential. An all-purpose cleaner is designed to tackle a wide range of materials and contaminants, making it a versatile addition to the list of car interior cleaning products. Let’s explore the features, benefits, and best practices for using an all-purpose cleaner to achieve a spotless interior.
Features and Benefits
- Versatility: As the name suggests, an all-purpose cleaner is formulated to clean multiple surfaces commonly found in car interiors. It can be used on vinyl, plastic, rubber, fabric, and even some types of upholstery, making it a convenient option for comprehensive interior cleaning.
- Effective Stain Removal: All-purpose cleaners are specifically designed to tackle tough stains, dirt, grime, and spills. Their powerful formula penetrates deep into the surface, loosening and lifting contaminants for easy removal.
- Time-Saving: Using a single product for multiple surfaces simplifies the cleaning process and saves time. With an all-purpose cleaner, you won’t need to switch between different cleaners for different parts of the interior, streamlining your car cleaning routine.
- Non-Damaging: A good quality all-purpose cleaner is formulated to be gentle on surfaces while still providing effective cleaning power. It should not cause discoloration, fading, or damage to materials when used as directed.
Best Practices for Using an All-Purpose Cleaner
- Read the Instructions: Before using any cleaning product, it’s important to carefully read the manufacturer’s instructions and follow them accordingly. This ensures optimal usage and prevents any potential damage to your car’s interior.
- Dilution Ratios: Many all-purpose cleaners come in concentrated form and require dilution with water. Follow the recommended dilution ratios mentioned on the product label to achieve the right balance of cleaning power and surface safety.
- Spot Test: Before applying the all-purpose cleaner to larger areas, perform a spot test on a small, inconspicuous area of the surface you intend to clean. This helps determine compatibility and ensures that the cleaner won’t cause any adverse effects.
- Surface Preparation: Remove loose dirt, debris, and larger particles from the surfaces before applying the all-purpose cleaner. This can be done by using a vacuum cleaner, a soft brush, or by simply wiping the area with a microfiber cloth.
- Application Technique: Spray the all-purpose cleaner directly onto the surface or onto a clean microfiber cloth or sponge. Gently agitate the cleaner with the cloth or sponge, working it into the surface to loosen dirt and stains.
- Wipe and Rinse: After agitating the cleaner, use a separate clean microfiber cloth to wipe away the dirt and residue. For surfaces that can be rinsed, such as plastic or rubber, rinse with clean water and wipe dry.
- Follow-Up Protection: Once the surfaces are clean and dry, consider applying a suitable protectant to maintain their appearance and protect against UV damage. This is especially important for plastic, vinyl, and rubber surfaces.
Remember to store the all-purpose cleaner in a cool, dry place, away from direct sunlight or extreme temperatures, to maintain its effectiveness.
Microfiber Cloths
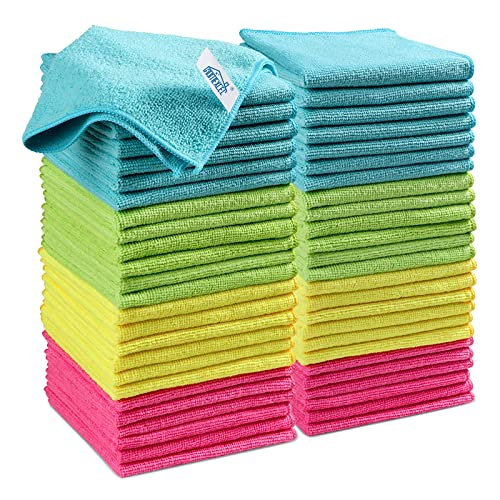
– Effective, streak-free cleaning
– Lint-free and scratch-free
– Wet and dry cleaning
– Versatile and easy to wash
– Reusable and durable
To achieve a clean and polished car interior, having the right tools is just as important as using the right cleaning products. Among the essential tools for car interior cleaning, microfiber cloths stand out as a reliable and versatile option.
Let’s quickly explore the features, benefits, and best practices for using microfiber cloths to achieve optimal results.
Features and Benefits
- Exceptional Absorbency: Microfiber cloths are made of ultra-fine synthetic fibers, typically composed of polyester and polyamide. These fibers are highly absorbent and can hold several times their weight in liquid. This makes them incredibly effective at absorbing spills, cleaning solutions, and lifting dirt and debris from surfaces.
- Non-Abrasive and Lint-Free: Microfiber cloths are renowned for their non-abrasive properties, meaning they won’t scratch or damage delicate surfaces. The fine fibers are tightly woven, minimizing the risk of leaving behind lint or fibers on the cleaned surfaces, ensuring a streak-free finish.
- Versatility: Microfiber cloths are suitable for cleaning a wide range of surfaces found in car interiors. They can be used on dashboards, windows, mirrors, upholstery, vinyl, plastic, and even delicate surfaces like touchscreens or instrument panels. Their versatility makes them an indispensable tool for all-round interior cleaning.
- Durability and Reusability: Microfiber cloths are known for their durability and long-lasting performance. When properly cared for, they can withstand numerous washes and maintain their effectiveness. This makes them a cost-effective option as they can be reused multiple times before needing replacement.
Best Practices for Using Microfiber Cloths
- Differentiate by Color: To avoid cross-contamination and ensure efficient cleaning, it’s beneficial to use different colored microfiber cloths for specific tasks. For example, assign a particular color for dusting, another for glass cleaning, and a separate one for wiping down surfaces. This helps prevent the transfer of dirt or cleaning solutions from one area to another.
- Dry Use: Microfiber cloths are highly effective when used dry for dusting and general wiping. Their electrostatic properties attract and capture dust particles, leaving surfaces clean and free of debris. Simply wipe the cloth gently across the surface to pick up the dust.
- Damp Use: For more thorough cleaning, slightly dampen the microfiber cloth with water or a diluted cleaning solution. Wring out excess moisture to avoid over-wetting the surface. This method is suitable for removing stains, fingerprints, or grime from various surfaces.
- Avoid Harsh Chemicals: While microfiber cloths are compatible with many cleaning solutions, it’s advisable to avoid using harsh chemicals, especially bleach or fabric softeners. These substances can degrade the cloth’s performance and affect its ability to absorb and clean effectively.
- Proper Care and Maintenance: After each use, rinse the microfiber cloth thoroughly to remove any dirt or residue. For regular maintenance, machine or hand wash the cloths separately using a mild detergent and avoid using fabric softeners. Air-dry them or tumble dry on a low heat setting. Avoid using heat or harsh drying methods, as they can damage the microfiber fibers.
- Replace When Needed: Over time, microfiber cloths may become less effective due to wear and tear. If you notice that a cloth is losing its absorbency or leaving streaks behind, it’s time to replace it with a new one.
Upholstery Shampoo
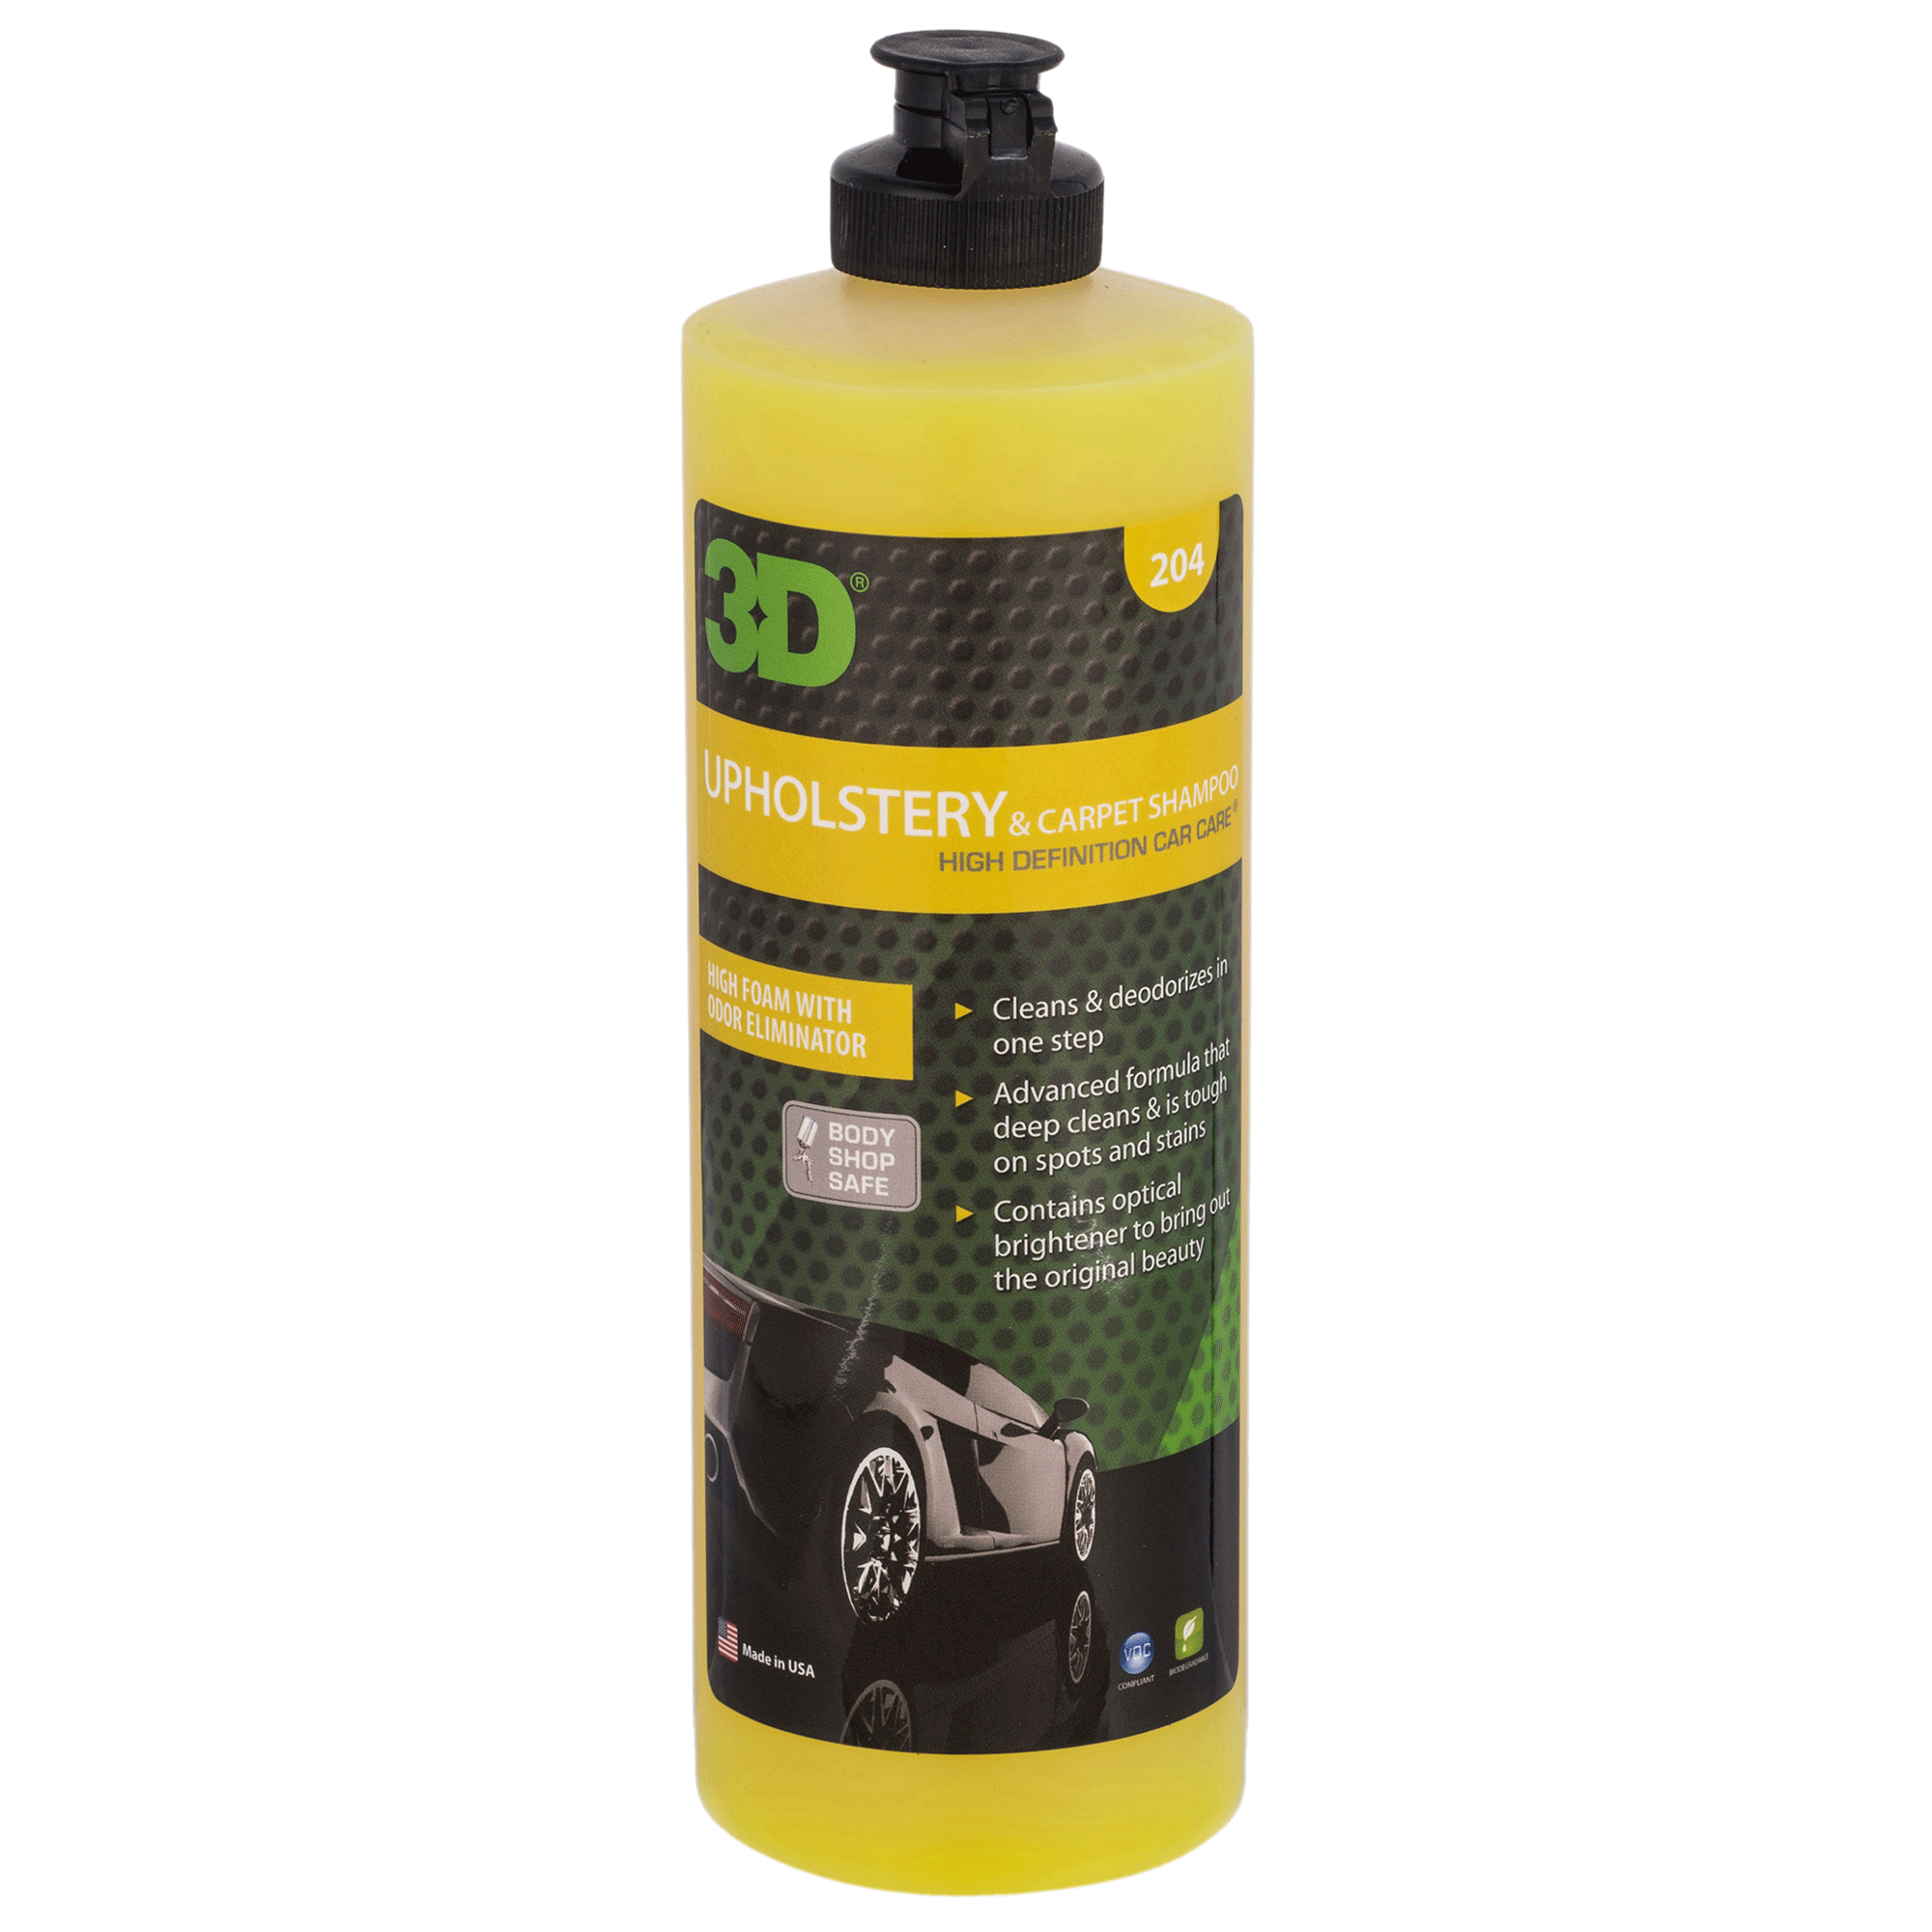
– One-step cleaning
– High foaming formula
– Fresh lemon scent
– High performance
Maintaining the cleanliness and appearance of your car’s fabric upholstery requires a specialized upholstery shampoo. Upholstery shampoo is formulated to help with your car upholstery cleaning. It deeply cleans and revitalizes fabric surfaces, helping to remove stubborn stains, dirt, and grime.
Here are some features, benefits, and best practices for using upholstery shampoo to achieve refreshed and inviting car interiors.
Features and Benefits
- Deep Cleaning Power: Upholstery shampoo is specifically designed to penetrate the fabric fibers and effectively lift dirt, stains, and odors from car upholstery. Its powerful formula works to break down and loosen ingrained contaminants, restoring the fabric’s original cleanliness.
- Stain Removal: One of the primary benefits of upholstery shampoo is its ability to tackle tough stains. Whether it’s spilled beverages, food marks, or other stubborn stains, the shampoo’s specialized ingredients work to dissolve and remove them, leaving your upholstery looking fresh and stain-free.
- Odor Elimination: Over time, car upholstery can absorb various odors, including food smells, pet odors, and general mustiness. Upholstery shampoo is formulated to neutralize and eliminate these odors, leaving your car’s interior smelling clean and pleasant.
- Fabric Revitalization: Upholstery shampoo not only cleans but also revitalizes fabric surfaces. It helps restore the fabric’s texture and appearance, making it look and feel refreshed. This can breathe new life into worn or faded upholstery, enhancing the overall aesthetics of your car’s interior.
Best Practices for Using Upholstery Shampoo
- Preparing the Surface: Before applying upholstery shampoo, vacuum the fabric surface to remove loose dirt, dust, and debris. This step helps prevent further soiling during the cleaning process and allows the shampoo to penetrate deeply into the fabric.
- Spot Testing: Prior to using upholstery shampoo on a large and visible area, it is crucial to conduct a spot test on a small, inconspicuous section of the upholstery. This helps ensure that the shampoo is compatible with the fabric and does not cause any discoloration or damage.
- Dilution and Application: Upholstery shampoos typically require dilution with water. Follow the manufacturer’s instructions for the appropriate dilution ratio. Once diluted, apply the shampoo onto a clean sponge or soft brush and gently work it into the fabric in circular motions. Avoid oversaturating the fabric to prevent excessive moisture absorption.
- Stain Treatment: For tough stains, apply a small amount of undiluted upholstery shampoo directly onto the stain. Use a soft brush or sponge to agitate the shampoo into the stain, working from the outer edges toward the center. Allow the shampoo to dwell for a few minutes to break down the stain, then blot or gently rinse with clean water.
- Thorough Rinsing: After applying the shampoo and agitating the fabric, thoroughly rinse the upholstery with clean water. This removes any residual shampoo and helps prevent any sticky or soapy residue from being left behind.
- Drying: After rinsing, remove excess moisture from the upholstery by blotting it with a clean, absorbent towel. Open the car’s windows or provide proper ventilation to facilitate air drying. Avoid using excessive heat sources, such as hairdryers, as they may damage the fabric.
- Optional Fabric Protection: Consider applying a fabric protectant after cleaning and drying the upholstery. Fabric protectants create a barrier that repels future stains and spills, prolonging the upholstery’s cleanliness and appearance.
Glass Cleaner
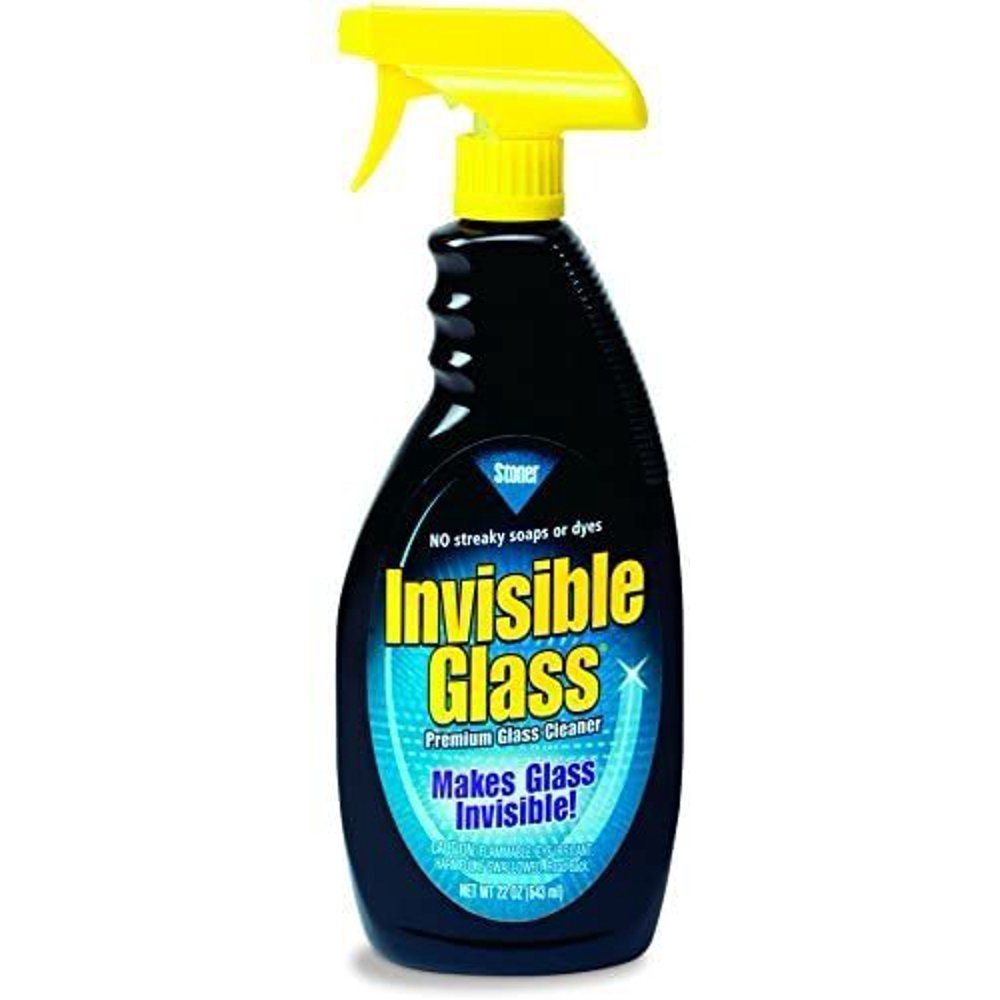
-Streak-free shine on windows, windshields, and mirrors
– Convenient spray bottle
– Ammonia-free
– Safe for tinted windows
To achieve pristine windows and mirrors in your car, a high-quality glass cleaner is a must-have. Glass cleaner is specifically formulated to remove dirt, fingerprints, smudges, and streaks from glass surfaces, providing optimal clarity and visibility.
Let’s explore the features, benefits, and best practices for using glass cleaner to achieve crystal-clear glass in your car.
Features and Benefits
- Streak-Free Formula: One of the primary benefits of a glass cleaner is its ability to leave behind a streak-free finish. The specialized formulation is designed to evaporate quickly, reducing the chances of streaks or residue being left behind on the glass. This ensures optimal clarity and visibility while driving.
- Effective Removal of Contaminants: Glass cleaner is formulated to dissolve and remove a wide range of contaminants commonly found on windows and mirrors. Fingerprints, smudges, grease, dirt, and other marks can be effectively eliminated, leaving the glass surfaces spotless and clean.
- Versatile Application: Glass cleaner is not only suitable for use on automotive glass but can also be used on household glass surfaces, such as windows and mirrors. This versatility allows you to utilize the same product for cleaning multiple glass surfaces, providing convenience and cost-effectiveness.
- Enhances Visibility and Safety: Clean and clear windows and mirrors are essential for optimal visibility while driving. Using a glass cleaner regularly ensures that your vision remains unobstructed, reducing the risk of accidents and improving overall safety on the road.
Best Practices for Using Glass Cleaner
- Choose the Right Cloth: When using a glass cleaner, it’s important to choose a lint-free microfiber cloth or a high-quality paper towel. These materials minimize the chances of leaving behind lint or fibers on the glass surface, ensuring a pristine finish.
- Shake the Cleaner: Before using the glass cleaner, give it a gentle shake to ensure that the formulation is well-mixed. This helps distribute the active ingredients evenly for effective cleaning.
- Spray Sparingly: Apply the glass cleaner sparingly to avoid excessive dripping or oversaturation. Spray a light mist of the cleaner onto the glass surface rather than directly onto the cloth to prevent any potential damage to nearby materials.
- Wipe in a Crosshatch Pattern: When cleaning the glass, use a consistent and methodical motion to achieve the best results. Wipe the glass in a crosshatch pattern, moving both vertically and horizontally. This helps ensure that the cleaner is evenly spread and any streaks or residue are effectively removed.
- Pay Attention to Edges and Corners: Don’t forget to clean the edges and corners of the glass thoroughly. These areas tend to accumulate dirt and grime, affecting the overall appearance and visibility. Use a folded cloth or a cotton swab to reach and clean these tight spaces.
- Dry with a Clean Cloth: After wiping the glass with the cleaner, use a separate clean and dry microfiber cloth or paper towel to gently buff the surface. This helps remove any remaining moisture and ensures a clear and polished finish.
- Avoid Direct Sunlight: It’s best to avoid cleaning glass surfaces under direct sunlight or in hot temperatures. High heat can cause the cleaner to evaporate too quickly, leading to streaking or uneven cleaning results. Choose a shaded area or clean the glass when the car is parked in a cool environment.
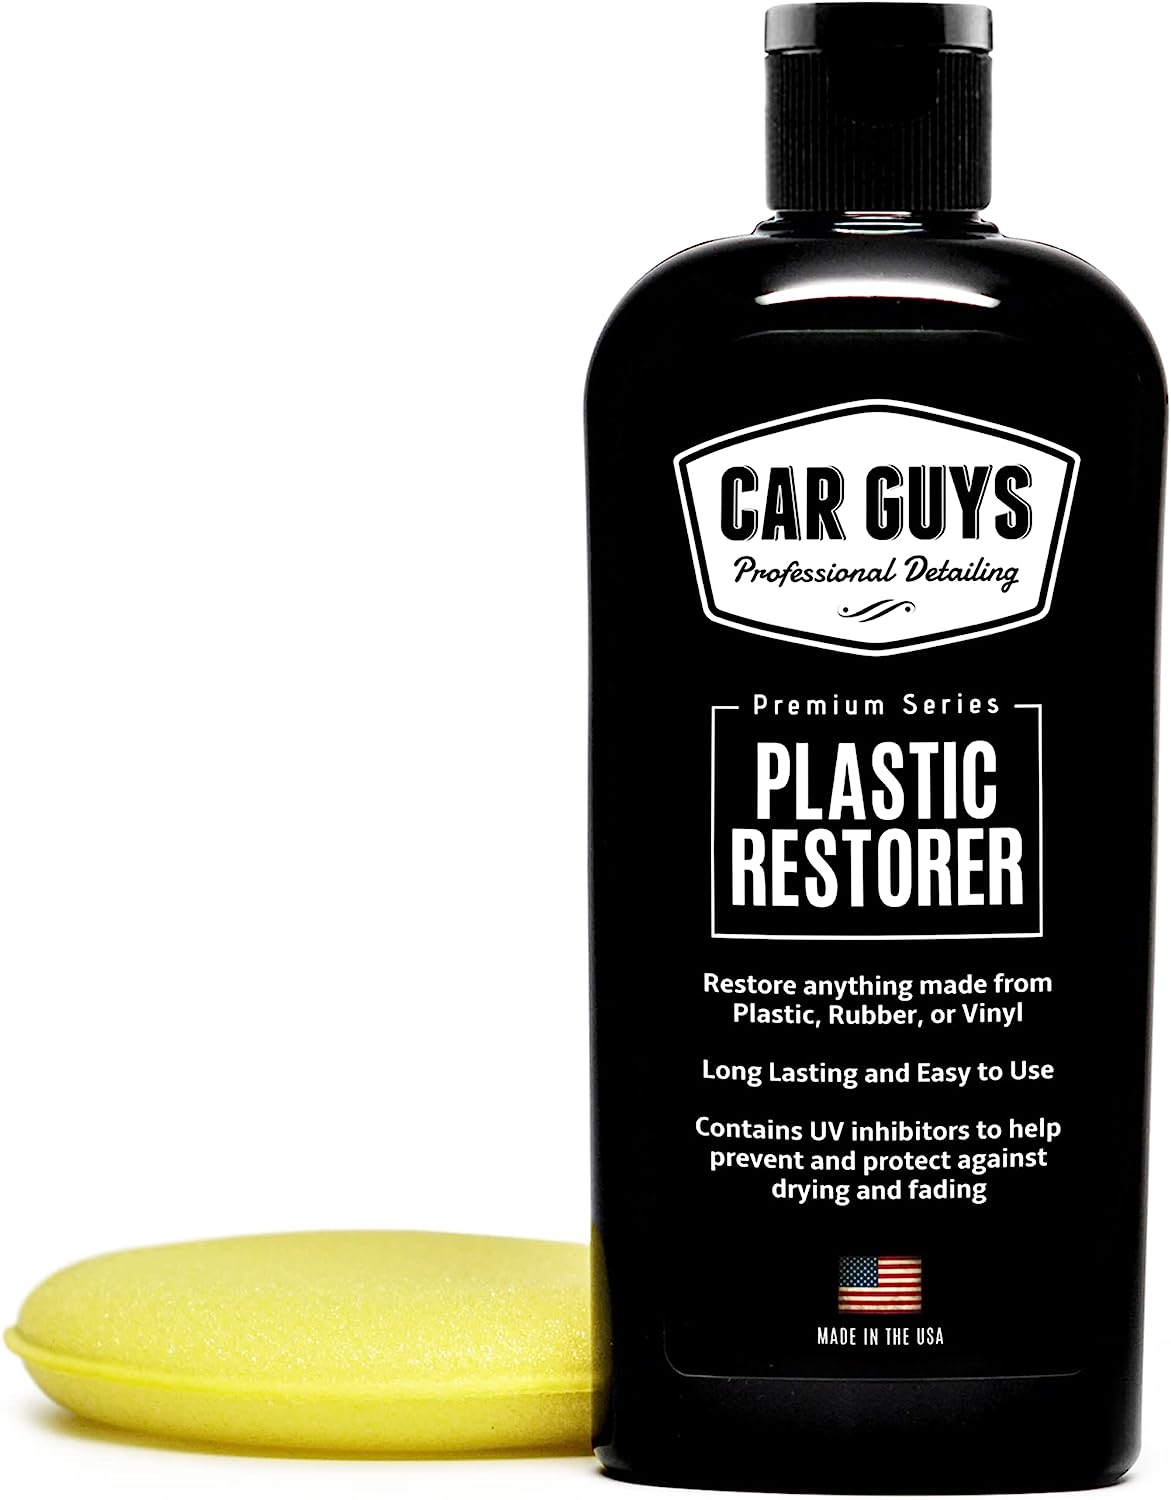
Leather Cleaner and Conditioner
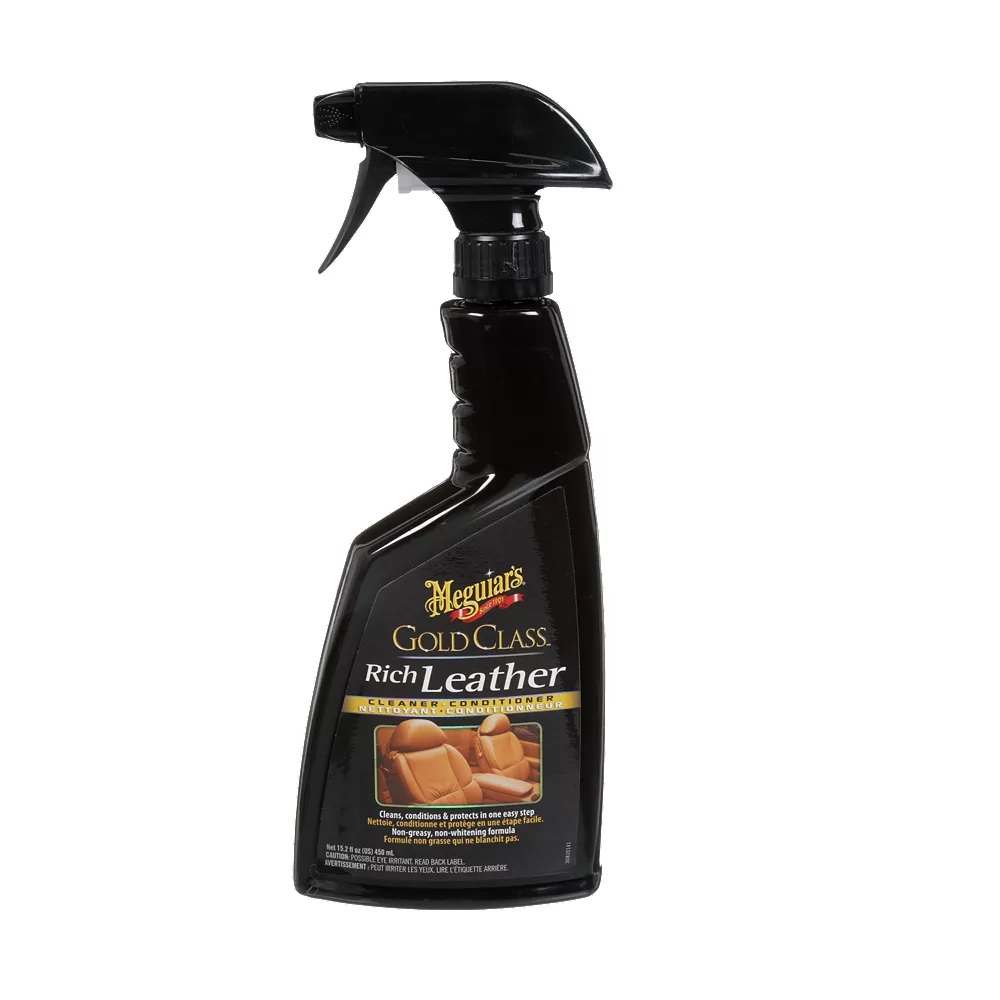
– All-in-one leather treatment
– Cleans, conditions and protects leather
– Offers UV protection
– Gentle on leather and safe on humans
– Non-greasy formula
A leather cleaner and conditioner is a crucial product for maintaining the elegance and longevity of your car’s leather seats. Designed specifically for leather surfaces, this product combination effectively cleans away dirt, grime, and stains while nourishing and protecting the leather. Let’s delve into the features, benefits, and best practices for using a leather cleaner and conditioner to keep your car’s leather seats in top condition.
Features and Benefits
- Gentle and Effective Cleaning: A leather cleaner is specially formulated to clean leather without causing damage or drying it out. It effectively removes dirt, oils, and stains that can accumulate on leather seats over time, restoring their natural luster and beauty.
- Nourishment and Moisture Balance: Leather conditioner plays a vital role in keeping leather seats supple and preventing them from drying out or cracking. The conditioner replenishes essential oils and moisture, restoring flexibility and preventing premature aging of the leather.
- UV Protection: Many leather conditioners contain UV inhibitors that help shield the leather from the damaging effects of sunlight. This protection prevents fading, discoloration, and cracking caused by prolonged exposure to UV rays, ensuring the longevity of your leather seats.
- Softening and Restoration: Over time, leather can become stiff and lose its softness. A quality leather conditioner helps soften the leather fibers, restoring their natural feel and enhancing the overall comfort of your car’s seats.
Best Practices for Using Leather Cleaner and Conditioner
- Preparing the Surface: Before applying any product, use a soft brush or vacuum cleaner with a brush attachment to remove loose dirt and debris from the leather seats. This step prevents scratching the leather during the cleaning process.
- Spot Testing: Before using a leather cleaner and conditioner on the entire seat, perform a spot test in an inconspicuous area to ensure compatibility and to check for any adverse reactions. Apply a small amount of the product and gently rub it into the leather, observing any changes or discoloration.
- Cleaning the Leather: Apply the leather cleaner onto a soft, lint-free cloth or sponge. Work the cleaner into a gentle lather and apply it to the leather seats in a circular motion. Pay special attention to areas with visible stains or soiling. Avoid excessive scrubbing, as it may damage the leather surface.
- Removing Excess Cleaner: After cleaning, use a clean, damp cloth to wipe away the excess cleaner from the leather. Ensure that no cleaner residue remains on the surface.
- Conditioning the Leather: Apply the leather conditioner onto a fresh cloth or applicator pad. Gently massage the conditioner onto the leather in circular motions, covering the entire surface evenly. Allow the conditioner to penetrate the leather for the recommended amount of time specified by the product instructions.
- Buffing and Polishing: After the conditioner has been absorbed into the leather, use a clean, dry cloth to buff and polish the seats gently. This step helps remove any excess conditioner and gives the leather a smooth, shiny finish.
- Regular Maintenance: To keep your leather seats in optimal condition, regularly clean and condition them. Follow the manufacturer’s recommendations for the frequency of application, as over-conditioning can lead to a greasy or sticky feel.
Remember to store your leather cleaner and conditioner in a cool, dry place, away from direct sunlight or extreme temperatures, to maintain their effectiveness.
Interior Detailing Brush
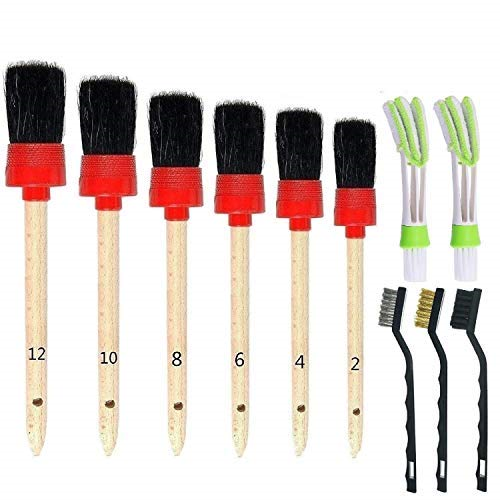
– Comes in multiple sizes
– Natural wooden handle offers a firm and comfortable grip
– Gentle and soft design for scratch-free cleaning
– High-quality design
An interior detailing brush is an invaluable tool for achieving a thorough and meticulous cleaning in the intricate areas of your car’s interior. This specialized brush is designed with soft bristles to effectively remove dust, dirt, and debris from hard-to-reach spots such as air vents, crevices, buttons, and small gaps. Let’s explore the features, benefits, and best practices for using an interior detailing brush to ensure a spotless and revitalized car interior.
Features and Benefits
- Gentle and Effective Cleaning: The soft bristles of an interior detailing brush make it suitable for delicate surfaces, ensuring that no damage or scratches occur during cleaning. The brush’s design allows for thorough cleaning without causing harm to buttons, knobs, grilles, or other intricate areas.
- Versatile Application: An interior detailing brush is versatile and can be used on various parts of the car’s interior. It is ideal for cleaning air vents, dashboard crevices, seat seams, door panels, and other tight spaces that are difficult to reach with regular cleaning tools. The brush’s narrow shape and fine bristles enable precise cleaning in intricate areas.
- Dust and Debris Removal: The bristles of an interior detailing brush effectively dislodge and capture dust, dirt, crumbs, and other debris from hard-to-reach areas. The brush’s bristles are designed to agitate and loosen particles, making it easier to remove them from the surfaces.
- Improved Interior Aesthetics: By effectively cleaning hidden and often neglected areas, an interior detailing brush helps to improve the overall appearance of your car’s interior. Removing dust and debris from these areas contributes to a cleaner and more visually appealing environment.
Best Practices for Using an Interior Detailing Brush
- Choose the Right Brush: Select an interior detailing brush with soft bristles made from materials such as nylon or horsehair. These bristle types are gentle enough to clean delicate surfaces without causing scratches.
- Start with Dry Cleaning: Begin by using the detailing brush on dry surfaces to remove loose dust and debris. Gently sweep the brush across the targeted areas, ensuring that the bristles reach into crevices, air vents, and other tight spaces.
- Vacuum Loose Debris: After using the detailing brush to dislodge dust and debris, use a vacuum cleaner with a brush attachment or a handheld vacuum to remove the loosened particles. This ensures that the dislodged dirt is completely eliminated from the interior.
- Dampen for Stubborn Stains: If you encounter stubborn stains or grime, slightly dampen the bristles of the detailing brush with a mild cleaning solution or water. Gently agitate the stained area to loosen the dirt, and then wipe it clean with a microfiber cloth or sponge.
- Air Dry the Brush: After use, rinse the interior detailing brush with water to remove any accumulated debris or cleaning solution. Shake off excess water and allow the brush to air dry thoroughly before storing it. Avoid using heat sources to dry the brush, as they can damage the bristles.
- Regular Maintenance: Clean the interior detailing brush regularly to remove any buildup of dust or debris. A clean brush ensures optimal performance and prevents the transfer of dirt from one area to another during cleaning.
Carpet and Upholstery Stain Remover
– Stain remover for carpets, upholstery, fabric, and more
– Non-toxic material
– Spray design
– Effective car interior cleaner
A carpet and upholstery stain remover is one product you will need to help you tackle tough stains and spills on your car’s carpets and upholstery. Designed to effectively lift and remove various stains, this specialized cleaner helps restore the cleanliness and appearance of your car’s interior surfaces. Let’s explore the features, benefits, and best practices for using a carpet and upholstery stain remover to achieve spotless and refreshed car upholstery.
Features and Benefits
- Powerful Stain Removal: A carpet and upholstery stain remover is formulated with powerful cleaning agents specifically designed to target and break down stubborn stains. It effectively lifts and removes a variety of stains, including coffee, food spills, grease, ink, and more.
- Versatile Application: The stain remover can be used on various types of car upholstery, including fabric, vinyl, and carpet. It is suitable for spot cleaning small stains or treating larger areas, depending on the extent of the staining.
- Quick and Convenient: With a carpet and upholstery stain remover, you can tackle stains promptly and efficiently. The fast-acting formula helps dissolve and lift stains quickly, saving you time and effort in the cleaning process.
- Restores Upholstery Appearance: By effectively removing stains, the stain remover helps restore the cleanliness and appearance of your car’s upholstery. It revitalizes the fabric or material, leaving it looking fresh and rejuvenated.
Best Practices for Using a Carpet and Upholstery Stain Remover
- Test in an Inconspicuous Area: Before using the stain remover on the entire upholstery, perform a spot test in an inconspicuous area. Apply a small amount of the cleaner to an unseen part of the upholstery and blot it with a clean cloth. Check for any adverse reactions or discoloration before proceeding.
- Blot, Don’t Rub: When treating a stain, remember to blot the affected area with a clean cloth or paper towel. Avoid rubbing or scrubbing the stain vigorously, as it can spread the stain or push it deeper into the fabric.
- Follow the Product Instructions: Read and follow the manufacturer’s instructions on the stain remover product label. Different stain removers may have varying application methods and dwell times, so it’s important to adhere to the specific guidelines for optimal results.
- Apply the Stain Remover: Apply a small amount of the stain remover directly onto the stain. Use a clean cloth or sponge to gently blot and work the product into the stain. Allow the stain remover to penetrate the fabric for the recommended dwell time.
- Blot and Lift: After the dwell time, blot the area with a clean cloth or paper towel to lift the stain and cleaning solution. Repeat the process if necessary until the stain is no longer visible or significantly reduced.
- Rinse or Remove Residue: Depending on the product instructions, you may need to rinse the area with clean water or use a clean damp cloth to remove any remaining residue from the stain remover. Always check the label for specific guidance.
- Allow to Dry: After treating the stain, allow the upholstery to air dry completely before using or applying any protectants or conditioners.
Odor Eliminator
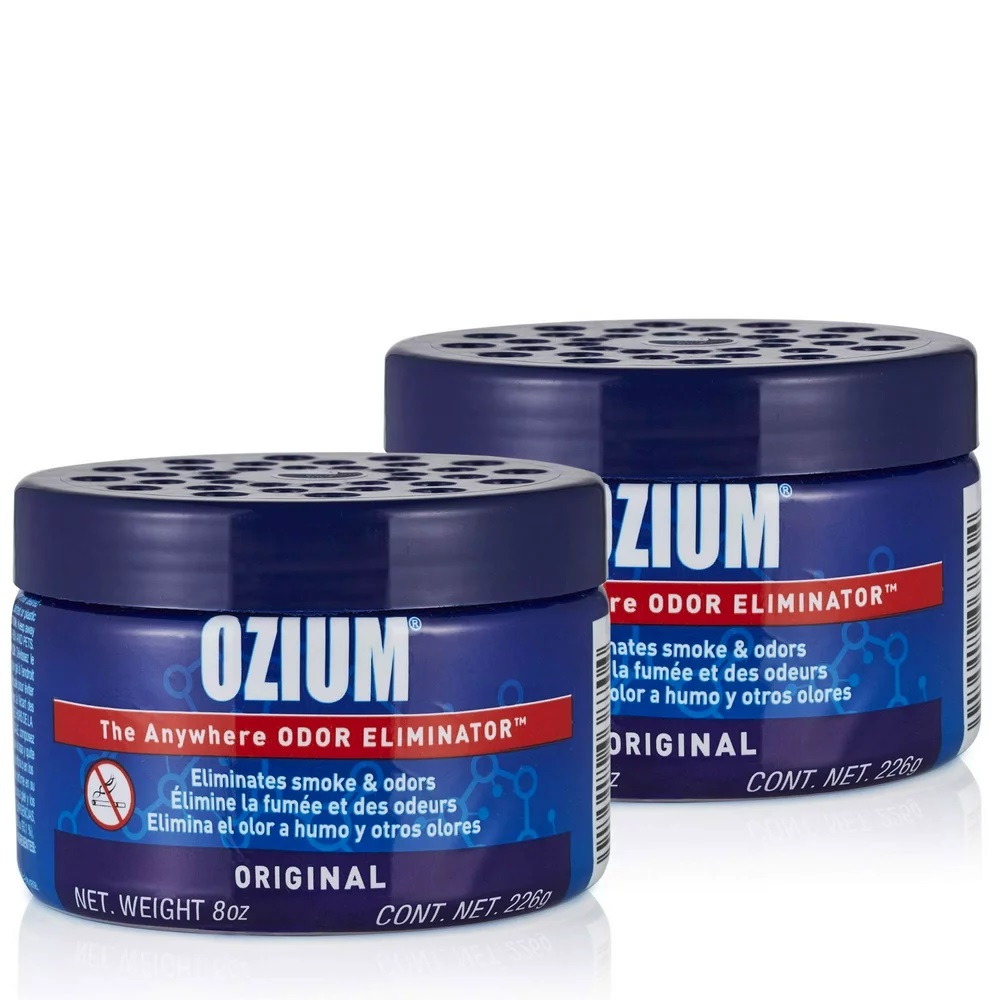
– Consistent fragrance release
– Gel won t melt in high temperatures
– Fresh, long-lasting scent
– Works 2 ways to remove smoke and odors
– Ideal for small spaces
To effectively neutralize and eliminate unpleasant odors from your car’s interior, an odor eliminator is a must-have product. Whether it’s lingering food smells, pet odors, cigarette smoke, or general mustiness, an odor eliminator works to neutralize the odor molecules, leaving your car smelling fresh and inviting. Let’s explore the features, benefits, and best practices for using an odor eliminator to create a pleasant and enjoyable environment inside your vehicle.
Features and Benefits
- Odor Neutralization: An odor eliminator contains specially formulated ingredients that work to neutralize and counteract odors at the molecular level. Rather than merely masking the odors, it targets the source, breaking down and eliminating the odor molecules, resulting in a genuinely fresh and odor-free interior.
- Versatile Application: Odor eliminators are designed for use in various areas of your car’s interior. They can be used on upholstery, carpets, headliners, floor mats, and even air vents, making it easy to target and eliminate odors from different surfaces.
- Long-Lasting Freshness: Unlike temporary solutions like air fresheners, an odor eliminator provides long-lasting freshness. By neutralizing odors instead of covering them up, it ensures that the unpleasant smells do not return, creating a consistently pleasant environment inside your car.
- Improved Air Quality: Eliminating odors from your car’s interior not only enhances the ambiance but also improves the overall air quality. By removing foul odors, an odor eliminator helps create a healthier and more enjoyable driving experience.
Best Practices for Using an Odor Eliminator
- Remove the Source: Before using an odor eliminator, it is essential to remove the source of the odor if possible. This can include cleaning up spills, removing trash or food remnants, and addressing any other causes of persistent odors.
- Clean and Vacuum: Prior to using the odor eliminator, thoroughly clean and vacuum the interior of your car. This helps remove any loose dirt, debris, or residue that may contribute to the lingering odors.
- Read and Follow Instructions: Each odor eliminator may have specific instructions for application and usage. Read and follow the manufacturer’s instructions provided on the product label for best results. Pay attention to any safety precautions and recommended application techniques.
- Application Techniques: Odor eliminators can be applied in various ways, depending on the product type. Some may be sprayed directly onto the surfaces, while others may require misting or placing the product in specific areas of the car. Follow the recommended application techniques to ensure even coverage and effective odor elimination.
- Targeted Application: Focus on areas that are prone to odors, such as carpets, upholstery, or air vents. Pay special attention to areas where spills or accidents may have occurred. Apply the odor eliminator evenly to these areas to ensure thorough coverage.
- Allow for Drying Time: After applying the odor eliminator, allow sufficient drying time as indicated by the manufacturer. This ensures that the product can work effectively to neutralize odors.
- Repeat as Needed: In cases of persistent or strong odors, you may need to repeat the application of the odor eliminator. Follow the product instructions for recommendations on frequency and reapplication.
Vinyl and Plastic Protectant
– Lasts for months
– Water repellent
– Non-greasy residue
– User friendly
– Safe application
A vinyl and plastic protectant is a specialized product designed to restore and protect the vinyl and plastic surfaces in your car’s interior. Over time, these surfaces can fade, crack, and deteriorate due to sun exposure and general wear and tear. A vinyl and plastic protectant helps rejuvenate these surfaces, providing UV protection, enhancing their appearance, and extending their lifespan. Let’s explore the features, benefits, and best practices for using a vinyl and plastic protectant to keep your car’s interior looking its best.
Features and Benefits
- UV Protection: One of the key benefits of a vinyl and plastic protectant is its ability to provide UV protection. These products contain ingredients that shield the surfaces from the damaging effects of sunlight, such as fading, cracking, and discoloration. The protectant acts as a barrier, preserving the appearance and integrity of the vinyl and plastic surfaces.
- Restores and Enhances Appearance: Vinyl and plastic protectants restore the natural shine and luster of the surfaces, giving them a refreshed and rejuvenated look. The protectant helps to restore any faded or dull areas, bringing back the vibrancy and richness of the original color.
- Prevents Cracking and Drying: The protectant formulation includes conditioners and moisturizers that penetrate the vinyl and plastic surfaces, preventing them from drying out and becoming brittle. By maintaining optimal moisture levels, the protectant reduces the likelihood of cracking or splitting, ensuring the longevity of these surfaces.
- Easy Application: Vinyl and plastic protectants are typically easy to apply. They come in spray, liquid, or gel form, allowing for simple and convenient application to the surfaces. This makes it effortless to treat and protect large areas, including dashboards, door panels, consoles, and other vinyl or plastic components.
Best Practices for Using a Vinyl and Plastic Protectant
- Clean the Surfaces: Before applying the protectant, ensure that the vinyl and plastic surfaces are clean and free from dust, dirt, and debris. Use a mild all-purpose cleaner or specifically formulated vinyl and plastic cleaner to remove any stains or grime. Wipe the surfaces dry with a clean cloth before proceeding.
- Shake the Protectant: Give the vinyl and plastic protectant container a good shake to ensure that the ingredients are well-mixed and evenly distributed.
- Application Techniques: Follow the manufacturer’s instructions on the product label for application techniques. Some protectants may be sprayed directly onto the surfaces, while others may require application with a clean cloth or sponge. Apply the protectant evenly, working it into the surfaces in a circular motion.
- Avoid Excessive Application: Use the protectant sparingly to avoid over-application. Applying too much protectant can result in a greasy or sticky residue on the surfaces. Start with a small amount and add more if needed, ensuring even coverage without excess product.
- Allow Drying Time: After applying the protectant, allow sufficient drying time as indicated by the manufacturer. This allows the product to bond with the surfaces and form a protective barrier.
- Buff and Wipe Off Excess: Once the protectant has dried, use a clean, lint-free cloth to buff and wipe off any excess residue. This helps ensure a smooth and non-greasy finish.
- Regular Maintenance: To maintain the protective barrier and appearance of the vinyl and plastic surfaces, regularly reapply the protectant according to the manufacturer’s recommendations. This ensures continued protection and keeps the surfaces looking their best.
Vacuum Cleaner
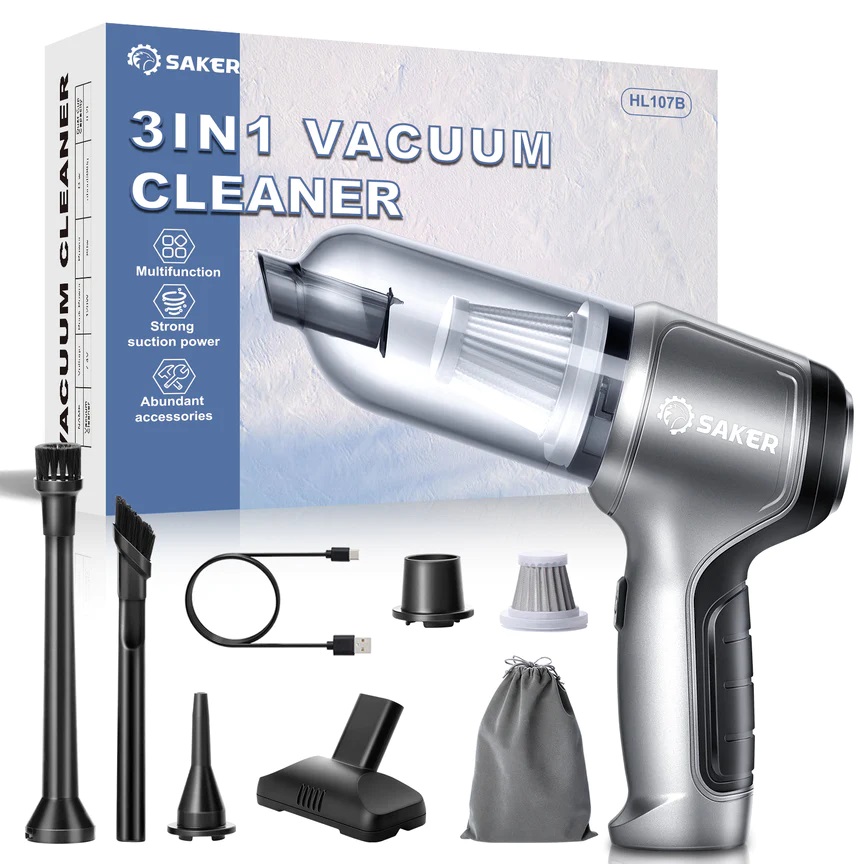
– 3-in-1 cleaning function
– Handheld, wireless cleaning
– Brushless motor
– 12,000 PA suction power
– Type C data cable charging
– Light and portable design
A vacuum cleaner is an essential tool for maintaining a clean and dust-free car interior. It is designed to effectively remove dirt, debris, crumbs, and other particles from various surfaces in your car, including carpets, upholstery, floor mats, and crevices.
Features and Benefits
- Powerful Suction: A vacuum cleaner is equipped with a powerful motor that generates strong suction, allowing it to effectively pull in dirt and debris from different surfaces in your car. This powerful suction ensures a thorough cleaning and leaves your car interior looking fresh and clean.
- Versatile Attachments: Vacuum cleaners often come with a variety of attachments designed for specific cleaning tasks. These attachments, such as crevice tools, upholstery brushes, and floor brush heads, enable you to clean different areas and surfaces with precision and efficiency.
- Removes Allergens and Dust: Vacuuming your car’s interior helps remove allergens, dust, and other microscopic particles that can accumulate over time. This promotes cleaner air quality inside the car and creates a healthier environment, particularly for individuals with allergies or respiratory sensitivities.
- Saves Time and Effort: Using a vacuum cleaner allows for quick and efficient cleaning compared to manual methods. The powerful suction and specialized attachments enable you to clean large areas and hard-to-reach places more effectively, saving you time and effort in the process.
Best Practices for Using a Vacuum Cleaner
- Remove Loose Items: Before vacuuming, remove any loose items such as trash, toys, or personal belongings from the car’s interior. This allows the vacuum cleaner to focus on cleaning the surfaces without obstruction.
- Choose the Right Attachment: Select the appropriate attachment for the specific area or surface you are cleaning. Use a crevice tool for narrow gaps and tight spaces, an upholstery brush for fabric surfaces, and a floor brush head for carpets or floor mats.
- Start from the Top: Begin vacuuming from the top of the car’s interior, such as the dashboard, console, and upper areas. This way, any debris or dust dislodged will fall onto lower surfaces, which can be vacuumed later.
- Vacuum All Surfaces: Vacuum all the surfaces in your car, including carpets, upholstery, floor mats, and the trunk. Pay special attention to high-traffic areas and spots prone to accumulating dirt or debris.
- Use Back-and-Forth and Circular Motions: When vacuuming carpets and upholstery, use back-and-forth and circular motions to ensure thorough coverage. This helps loosen and lift embedded dirt and ensures more effective cleaning.
- Clean Attachments Regularly: To maintain optimal suction and performance, clean the vacuum cleaner’s attachments regularly. Remove any hair, debris, or dust that may accumulate in the brushes or crevice tools.
- Empty and Clean the Vacuum: After each use, empty the vacuum cleaner’s collection bin or bag and clean any filters or components as recommended by the manufacturer. Regular maintenance ensures the vacuum cleaner continues to function at its best.
Conclusion
In conclusion, proper car interior cleaning is essential for maintaining a pristine and inviting environment inside your vehicle. The 10 essential car interior cleaning products discussed above will help you effectively address various cleaning needs and achieve optimal results.
From cleaning surfaces, removing stains, eliminating odors, to protecting and restoring upholstery, these products offer the versatility, effectiveness, and convenience necessary for comprehensive car interior care. Regular use of these products will not only enhance the appearance of your car’s interior but also contribute to a more comfortable and enjoyable driving experience.
Invest in these car interior cleaning products and transform your vehicle’s interior into a fresh and rejuvenated space for your travels.


